I recently started playing around with Ruby and Rails. I haven’t done much with it yet short of these CodeSchool courses, but it seems really powerful. I did run into a bit of a hiccup when installing it, though, so I thought I’d write a quick post on how to get it installed in windows.
Just a quick note: as of this writing the latest version of Ruby is 1.9.3
Step 1 – Get The Files
Ok, the first thing you need to do is get the files you’re going to install. A quick search for “Ruby on Rails download” will lead you to this page: http://rubyonrails.org/download. The page tells you to download Ruby and RubyGems, but you’ll also need one more file.
The list of files you need are:
- Ruby: rubyinstaller-1.9.3-p194.exe
- RubyGems: Click the “Zip” button at the top (1.8.24 as of this writing)
- Ruby DevKit: DevKit-tdm-32-4.5.2-20111229-1559-sfx.exe
Note these files are the latest versions as of this writing. You may see newer ones if they have been updated.
OK, so you have the three installer files now, so let’s get started.
Step 2 – Install Ruby
This is pretty straight forward. Open the Ruby installer (rubyinstaller-1.9.3-p194.exe) and the first thing you need to do is review and accept the license agreement:
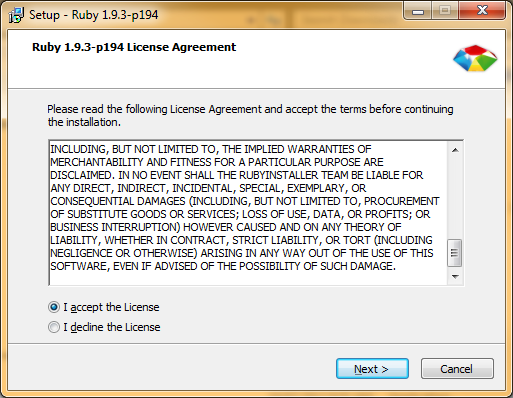
Then click “Next >” and you’ll be given a choice on where to install it to. I don’t like to clutter up my C: drive, so I installed it to C:\langs\Ruby193. You can keep it as the default or put it wherever you want.
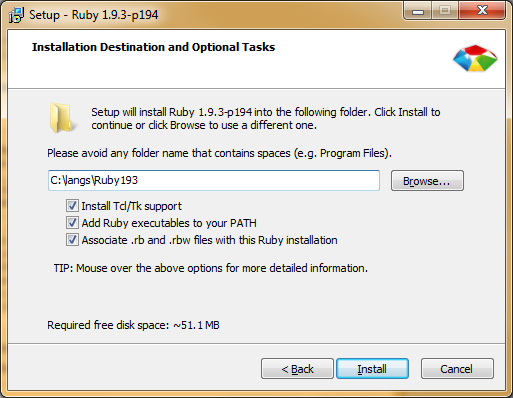
You’ll probably want to check the three tick boxes as well.
- Install Tcl/Tk support – This installs libraries for making GUI applications with Ruby
- Add Ruby executables to your PATH – This will allow you to run “ruby” and other ruby exes from any directory in the command prompt.
- Associate .rb and .rbw files with this ruby installation – The only reason you may not want this is if the files are already associated with something else.
Now, click install and it will copy all the files and then you’ll see the complete screen:
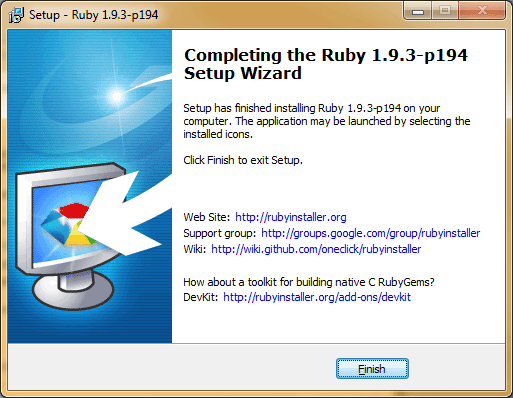
Click “Finish” and you’re done installing Ruby!
Step 3 – Install RubyGems
RubyGems “is the standard Ruby package manager.” Once installed, you’ll use it to install Rails into your Ruby installation. Unzip the RubyGems file (rubygems-1.8.24.zip) to a temp directory. I chose C:\temp\. Now, navigate to this folder in Windows Explorer and you should see these files:
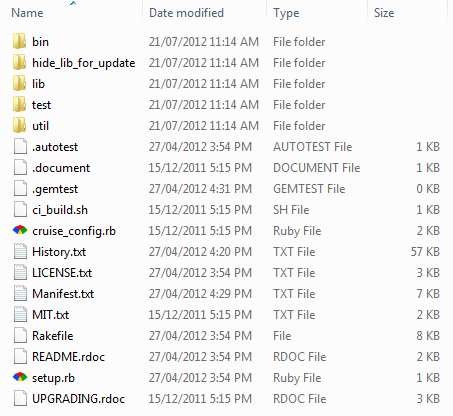
You’ll note here that there’s a “setup.rb” file. That’s what we want to run. So fire up the command prompt (Windows Key + R » Type: cmd » Hit Enter) and move to that directory. Then, you’ll want to run the command “ruby setup.rb” and you should see something like this
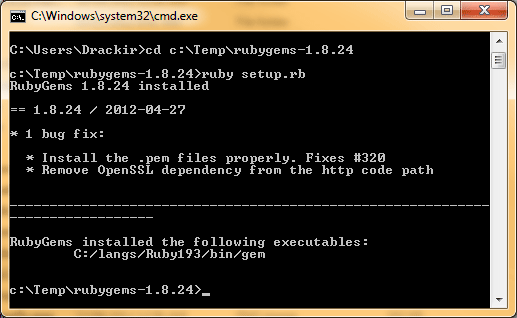
Note: if you didn’t add Ruby executables to your PATH, you’ll have to provide the full path to Ruby. Also, If you did Associate .rb and .rbw files with the ruby install, you can just run “setup.rb”.
OK! So, Ruby and RubyGems are installed. Woohoo! Almost there.
Step 4 – Install Rails
Now, the instructions on RubyOnRails.org/Download tell you to run “gem install rails”. So do this in your command prompt window and hopefully you’ll see a bunch of messages saying “Fetching: xxxx (100%)”, “Successfully installed xxxx”, “Installing ri documentation for xxxx” and “Installing RDoc documentation for xxxx”. Make sure that you allow ruby to connect to the internet through your firewall if you have one (and you should). I’m not going to post a screenshot since there’s a lot of messages and it’s all pretty much summed up by the previous few lines. Note you may see a “file ‘lib’ not found” message. This hasn’t caused me any issues so it’s probably ok. 🙂
Step 5 – Install the DevKit
This step isn’t in the RubyOnRails.org/Download list. Their next step is to create a new rails site, but when I try that it gives me this error message:
|
1 2 3 4 5 |
Installing json (1.7.3) Gem::InstallError: The 'json' native gem requires installed build tools. Please update your PATH to include build tools or download the DevKit from 'http://rubyinstaller.org/downloads' and follow the instructions at 'http://github.com/oneclick/rubyinstaller/wiki/Development-Kit' An error occured while installing json (1.7.3), and Bundler cannot continue. Make sure that `gem install json -v '1.7.3'` succeeds before bundling. |
So, I do what it says and run “gem install json -v ‘1.7.3’” and get this message:
|
1 2 3 4 |
ERROR: Error installing json: The 'json' native gem requires installed build tools. Please update your PATH to include build tools or download the DevKit from 'http://rubyinstaller.org/downloads' and follow the instructions at 'http://github.com/oneclick/rubyinstaller/wiki/Development-Kit' |
It all comes back to to the DevKit. Open up the DevKit executable (DevKit-tdm-32-4.5.2-20111229-1559-sfx.exe). It’s a self extracting zip file and I chose to extract it to C:\langs\ruby193\devkit just to keep everything nicely together. ( I’m actually not entirely sure if you need the files after you install it so if you know, drop a comment. 🙂 )
Once you have it extracted, get in your command prompt and change directory until you get into the folder where you extracted it (i.e. C:\langs\Rub193\DevKit) and run this command: ruby dk.rb init This initializes the DevKit installation. You should see a message like this:
|
1 2 3 |
[INFO] found RubyInstaller v1.9.3 at C:/langs/Ruby193 Initialization complete! Please review and modify the auto-generated 'config.yml' file to ensure it contains the root directories to all of the installed Rubies you want enhanced by the DevKit. |
The first line, beginning with [INFO] should show the path you installed Ruby to in Step 2. Don’t worry about looking at the config.yml file unless you know you have other Ruby installs you want (or don’t want) to link it to.
Next, you have to run this command: ruby dk.rb review This will spit out something along these lines:
|
1 2 3 |
Based upon the settings in the 'config.yml' file generated from running 'ruby dk.rb init' and any of your customizations, DevKit functionality will be injected into the following Rubies when you run 'ruby dk.rb install'. C:/langs/Ruby193 |
This should match the path to whatever was detected when you ran ruby dk.rb init (which should be your Ruby install directory from Step 2).
Finally, once you’ve verified that these are correct, run this command:
ruby dk.rb install
This should give you this message:
|
1 2 |
[INFO] Updating convenience notice gem override for 'C:/langs/Ruby193' [INFO] Installing 'C:/langs/Ruby193/lib/ruby/site_ruby/devkit.rb' |
And your done! DevKit is installed!
Step 6 – Setup A Test Rails Site
All that’s left is to set up a test rails site and you’ll be ready to roll. I created mine here: C:\www\rails\TestRailsSite but you can create yours anywhere. Just get to the directory in the command prompt and run this command: rails new . (Don’t forget the period at the end to let it know you want to use the current directory.)
You’ll see it create a bunch of files and run a bunch of fun stuff. It will also install a few gems and eventually it should complete with no errors.
Step 7 – Test It!
To test it, just run rails server (or rails s) and point your browser to http://localhost:3000/
Conclusion
That’s it! You’re done. I hope this post has helped someone out who was having the same issues as me. If you have any questions or comments drop them in the form below.
Happy programming.


Trying to install ruby and ror on windows had been a nightmare. Fortunately I stumbled upon this helpful tutorial. After hours of fumbling around, I’ve finally have ruby/ror up and running in less than half an hour thanks to your help.
Very straightforward and helpful. Many thanks.
Richard, thank you very very much for this excellent step-by-step tutorial. My rails is working now.
Glad I could help! Were you using the latest version or the version I noted here? I should probably update this for the newest releases.
1.9.3-p545
Good luck with your biz adventure of working for youself.
Thank you for your guide. It was invaluable. I seem to have one problem. When I attempt to follow Step 6 it doesn’t recognize the command (‘rails’ is not recognized as an internal or external command etc…). I’m fairly certain I followed all your steps correctly. Should I uninstall and start from Step 1 again?
Hi Tarik,
It sounds like either rails didn’t install correctly or the path to rails isn’t in your system’s PATH variable. Did you get any error messages when you installed rails in step 4? Do you see anything when you run ruby -v? Try restarting the computer and running it again.
Thank you for your help Richard. I got no error messages from Step 4. The error I did receive was the expected one from Step 5 from not having the DevKit installed yet.
When I run ruby -v, I get the following version: ruby 1.9.3p550 (2014-10-27) [i386-mingw32]
I’ve restarted my machine and attempted to re-run the “rails new .” but still receive the same command not recognized error.
Can you try running gem install rails again?
I attempted to run that command again and this time I did run into an error:
C:\temp\rubygems-2.4.3>gem install rails
Temporarily enhancing PATH to include DevKit…
Building native extensions. This could take a while…
ERROR: Error installing rails:
ERROR: Failed to build gem native extension.
C:/Ruby193/bin/ruby.exe -r ./siteconf20141113-7316-eumc89.rb extconf.rb
creating Makefile
make clean
Makefile:165: *** target pattern contains no
%'. Stop.make
Makefile:165: *** target pattern contains no %’. Stop.
make failed, exit code 2
Gem files will remain installed in C:/Ruby193/lib/ruby/gems/1.9.1/gems/json-1.8.
1 for inspection.
Results logged to C:/Ruby193/lib/ruby/gems/1.9.1/extensions/x86-mingw32/1.9.1/js
on-1.8.1/gem_make.out
I found a note about this in the Ruby Gems GitHub issue tracker: https://github.com/rubygems/rubygems/issues/977
Basically, they say to revert the version of Ruby Gems (if you’re using Ruby 1.9.3) with the following command:
gem update --system 2.3.0I successfully reverted to gems version 2.3.0. I ran gem install rails again and got all the way to this point:
Successfully installed rails-4.1.7
Installing ri documentation for json-1.8.1
Installing ri documentation for i18n-0.6.11
Installing ri documentation for activesupport-4.1.7
Installing ri documentation for erubis-2.7.0
Installing ri documentation for builder-3.2.2
Installing ri documentation for actionview-4.1.7
Installing ri documentation for rack-1.5.2
Installing ri documentation for rack-test-0.6.2
Installing ri documentation for actionpack-4.1.7
ERROR: While executing gem … (Errno::EINVAL)
Invalid argument – ./ActionDispatch/Routing/Mapper/Scoping/:
Maybe try again?
That worked! I’ve created the test web site and successfully navigated to it on my browser.
Thanks again for all your help Richard. It’s much appreciated!
No problem! Happy to help. 🙂
GREAT POST !!
Got this post after 2 days of trails.
Also – as of today – install ruby 2.1.6 if you do not want unknown bugs
First of all I am new on rails. When I follow the steps trying to install ruby, everything works (including ‘rails new’) and except I got problems when running the ‘rails server’ command. I have installed ruby 2.2.3 and rubygems-2.4.8. Here is the error when running ‘rails server’:
What could be the problem? This post is the closet one I could get so far and really hope can make it work.
Appreciated if anyone could help me out,
Hi Sean,
Take a look at this StackOverflow post: http://stackoverflow.com/q/17643897/429949
It sounds like the same issue.
Hope it helps!
~Richard
My problem was with the devkit. Your tutorial really helped. Thanks.
Mr Richard, thank you very much for this excellent step-by-step tutorial. My problem was with the devkit .
My rails is working now.